Summary:
You’re ready for more space. Not just square footage you can use three months a year, but actual living area that works in January and July. That’s the difference between adding a screened porch and building a 4-season room. One gives you a nice spot when the weather cooperates. The other gives you a room you’ll actually use.
But getting from “I want this” to “I’m sitting in it with my morning coffee” involves more than most Nassau County homeowners realize. Foundation work that meets local codes. Permits that require professionally stamped drawings. HVAC decisions that affect your whole house. Insulation specs that determine whether you’re comfortable or constantly adjusting the thermostat. Here’s how the process actually works when you’re adding a 4-season room in Nassau County, and what happens at each stage.
Understanding What Makes a 4-Season Room Different
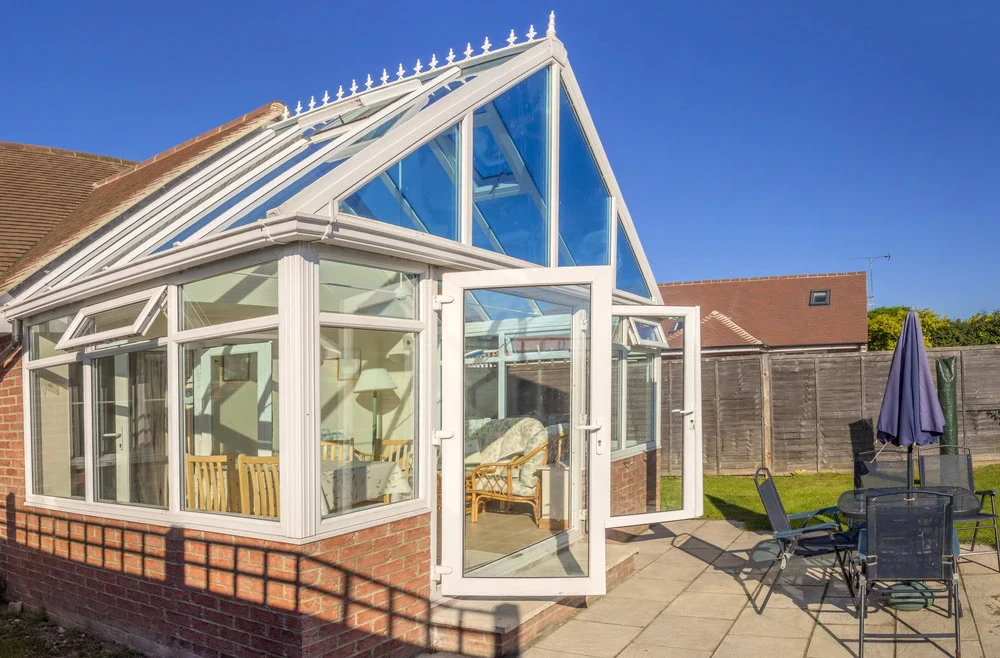
A 4-season room isn’t just a sunroom with better windows. It’s engineered differently from the ground up because it needs to function as actual living space when it’s 20 degrees outside or 95 degrees with Long Island humidity.
The key difference is climate control. A true 4-season room includes full insulation in the walls, ceiling, and floor—not the minimal insulation you find in three-season spaces. It has double-pane or triple-pane insulated glass designed to handle temperature extremes. It connects to your home’s HVAC system or has its own dedicated heating and cooling that can actually keep up with Nassau County’s weather.
Three-season rooms work great from April through October. Then they sit empty for half the year because they’re too cold in winter and often too hot in summer. If you’re investing in additional square footage, you want space that earns its keep twelve months a year, not a room that becomes a storage area when the temperature drops.
Building a 4-Season Room: Foundation Requirements That Meet Nassau County Codes
Your 4-season room needs a proper foundation. Not a deck with footings. Not the concrete patio slab you poured ten years ago. An actual foundation designed to support conditioned living space and meet Nassau County’s specific building codes for permanent structures.
Most projects in Nassau County start with one of three foundation approaches. A concrete slab foundation works well if you’re building on level ground and want to control costs without sacrificing quality. It gets poured at least four inches thick with proper reinforcement and rigid foam insulation underneath to prevent heat loss through the floor. Crawl space foundations give you more flexibility with uneven terrain and make it easier to run utilities like HVAC ducts and electrical lines without tearing up your existing house. Full basement foundations cost significantly more but give you additional storage or even finished living space below the sunroom.
The foundation needs to tie into your existing home’s structure correctly. That means matching the depth of your current foundation—usually below the frost line in New York—and ensuring proper drainage slopes away from both the new room and your house. Poor drainage isn’t just inconvenient. It causes water to pool around the foundation, leads to settling issues, and creates moisture problems that work their way into walls.
Site preparation matters more than most people think. The ground needs to be properly graded and compacted before any concrete gets poured. Any trees, shrubs, or landscaping in the way need to be removed or relocated. Utility lines—electric, gas, water, cable—have to be marked so nothing gets damaged during excavation. This prep work happens before the foundation goes in, and rushing through it creates problems that are expensive to fix later.
In Nassau County, you’ll need inspections at various stages, and the building department doesn’t mess around. They check the foundation before you’re allowed to proceed with framing. They want to verify it meets load requirements, has proper footings at the correct depth, includes adequate reinforcement, and will actually support the structure you’re planning to build. Experienced contractors who work in Nassau County regularly know exactly what inspectors look for. We schedule inspections at the right times and make sure everything passes the first time instead of creating delays.
Navigating Nassau County Permits and Building Code Requirements
Permits aren’t optional when you’re adding a 4-season room in Nassau County. Every township requires them for additions that add conditioned living space to your home. The process can feel bureaucratic and time-consuming, but it exists to ensure your room is safe, structurally sound, and built to standards that protect your investment.
The permit application involves submitting detailed construction plans to your local building department—Town of Hempstead, Town of Oyster Bay, or whichever municipality your property falls under. Those plans need to show the foundation design with depth and reinforcement specifications. Structural framing with load calculations. Electrical layout showing outlets, switches, and how power gets run to the room. HVAC integration explaining how the space will be heated and cooled. And connection details showing how the new room attaches to your existing house without compromising its structural integrity.
Some Nassau County townships require professionally stamped architectural drawings from a licensed architect, especially for larger projects or additions in certain zoning districts. Others accept detailed builder plans if the contractor has the right credentials. It depends on where you live and the complexity of your specific project. This is information you need to know before you start, not after you’ve already submitted plans that get rejected.
Permit costs typically run $300 to $1,000 depending on the project size, scope, and which township you’re dealing with. That might seem like an unnecessary expense when you’re already spending tens of thousands on the room itself. But building without permits creates much bigger problems. You could face fines that dwarf the permit cost. You might have serious trouble selling your home later when title searches reveal unpermitted work. Insurance companies sometimes refuse to cover unpermitted additions, leaving you exposed if something goes wrong. And if there’s ever a structural issue, you’re on the hook for everything because there’s no inspection trail proving the work was done correctly.
The review process takes time—usually two to six weeks for standard applications in most Nassau County townships. Complex projects or building departments with backlogs can take longer. This is why we submit permits early in the process, often before you’ve even finalized every single design detail. The goal is to have approvals in hand before construction is scheduled to start, not to be waiting on permits while good weather passes.
Nassau County has specific requirements that differ from Suffolk County, and individual townships within Nassau have their own additional regulations layered on top. Setback requirements dictate how close you can build to your property line—often 10 to 25 feet depending on the zone. Height restrictions limit how tall your room can be. Lot coverage limits affect how much of your total property can be covered by structures. Some neighborhoods have homeowners association rules that add another layer of approval. We navigate these requirements routinely because we deal with them on every project. If you’re going it alone, expect to spend significant time researching what applies to your specific property, and be prepared for the learning curve.
Inspections happen at multiple stages throughout construction. Foundation inspection before you pour concrete or proceed with framing. Framing inspection before walls are closed up with drywall or other finishes. Electrical inspection before wiring gets concealed. HVAC inspection before ductwork or equipment gets covered. Final inspection before you get your certificate of occupancy and can legally use the room. Each inspection needs to pass before you move to the next phase. Failed inspections mean stopping work, making corrections, and scheduling a re-inspection—all of which adds time and cost. This is why working with contractors who know what Nassau County inspectors look for saves both time and money. We get it right the first time instead of learning expensive lessons during your project.
HVAC and Insulation: Making Your 4-Season Room Actually Work Year-Round
Climate control is what separates a 4-season room from a space you can only use when the weather’s perfect. Getting it right means understanding both insulation and HVAC requirements from the start, not trying to fix comfort problems after the room is built.
Insulation goes in the walls, ceiling, and floor—not as an afterthought, but as part of the core design. You need R-values that match or exceed what’s required for regular living spaces in New York. That typically means R-13 to R-21 for walls and R-30 to R-49 for ceilings, depending on your specific construction method and materials. Under-insulating saves money upfront but costs you every single month in higher energy bills and a room that’s never quite comfortable no matter how much you run the heat or AC.
The glass is equally important because your 4-season room has a lot more of it than regular rooms. Double-pane insulated glass is the minimum standard for true year-round use. Low-E coatings help control heat transfer and block UV rays that fade furniture and flooring over time. Some homeowners opt for triple-pane glass in north-facing walls where heat loss is greatest during Nassau County’s winter months. The framing system matters too—thermally broken aluminum frames prevent the frame itself from conducting heat and cold into the room, eliminating those cold spots you feel near windows in poorly designed spaces.
Choosing Between Extending Your HVAC System or Installing Dedicated Climate Control
You have two main options for heating and cooling your 4-season room, and the decision affects both comfort and long-term operating costs. You can extend your existing HVAC system or install a dedicated unit for the new space.
Extending your current system means running new ductwork from your furnace and air conditioner into the sunroom. This approach works if your existing HVAC equipment has enough capacity to handle the additional square footage without struggling. Most systems are sized with some buffer built in, but adding 200 or 300 square feet of highly glazed space can push things beyond what your equipment can handle efficiently. An HVAC contractor should calculate the actual load before you commit to this approach. They’ll consider the room’s size, glass area, insulation levels, and sun exposure to determine whether your current system can handle it or if you need to upgrade equipment.
The advantage of extending your existing system is simplicity. One thermostat controls your whole house. No additional equipment to maintain or replace down the road. The disadvantage is that a room made mostly of glass heats and cools differently than the rest of your home. The sunroom might be 80 degrees from afternoon sun while your living room is comfortable at 72. Setting the thermostat to make your sunroom comfortable might make your living room too warm in winter or too cold in summer. You end up constantly adjusting settings trying to balance comfort in different parts of your house.
Dedicated mini-split systems solve this problem by giving you independent temperature control for the sunroom. They’re designed specifically for single-room applications and work extremely well in spaces with high glass areas. A mini-split has an outdoor compressor unit and an indoor air handler that mounts on the wall or ceiling. They’re extremely efficient—especially for heating—and they don’t require ductwork, which means less invasive installation than extending your existing system through walls and ceilings.
Some Nassau County homeowners add radiant floor heating for winter comfort, particularly when they’re using tile or stone flooring in the sunroom. The floor stays warm underfoot, and the heat radiates upward naturally instead of blowing down from vents. You still need cooling for summer, but radiant heat creates a comfort level that forced air can’t match on cold January mornings when you want to sit with your coffee and watch snow fall.
The wrong approach is trying to heat or cool your 4-season room with portable space heaters or window AC units. They’re not designed for continuous daily use. They create hot and cold spots instead of even temperature. And they often cost more to operate than properly sized permanent systems because they’re inefficient. If you’re investing in a 4-season room, invest in climate control that actually works.
What to Expect During Construction: Timeline and Project Phases
Building a 4-season room typically takes anywhere from a few weeks to a couple of months from permit approval to final inspection and certificate of occupancy. The timeline depends on project size, weather conditions, material availability, and how quickly inspections get scheduled with your local building department.
The process starts with design consultation where you work with us to nail down the room’s size, location, style, and features. This is where you make all the decisions that affect both cost and comfort—glass options, roofing materials, flooring type, how the room will connect to your existing house, and what kind of HVAC system makes sense. Expect this phase to take one to three weeks as you refine the design, look at samples, and finalize specifications. Rushing through design to save time almost always creates problems later when you realize you should have made different choices.
Once the design is set and you’ve signed off on everything, permit applications get submitted to Nassau County. As mentioned earlier, this review process takes two to six weeks in most townships. We often start ordering materials during this waiting period—especially custom windows or specialty items with long lead times—so everything arrives when permits are approved and you’re ready to break ground.
Site preparation and foundation work happen next. The area gets cleared of landscaping, excavated to the proper depth, and graded for drainage. Forms are built and concrete is poured for your foundation. The concrete needs time to cure properly—usually at least a week before framing can begin. Foundation inspection happens before you proceed to the next phase. This is when the building inspector verifies that footings are at the correct depth, reinforcement is properly placed, and everything meets code requirements.
Framing goes up relatively quickly once the foundation passes inspection. The walls, roof structure, and rough openings for windows and doors typically take one to two weeks depending on the room’s size and complexity. Framing inspection happens before the walls get closed up because inspectors need to see the structural elements before they’re covered. This inspection verifies that framing members are properly sized and spaced, connections are secure, and the structure will safely support the loads it’s designed for.
Windows and doors get installed after framing passes. Electrical wiring gets roughed in—outlets, switches, lighting, and the circuit that powers everything. HVAC ductwork or equipment gets installed and connected. Insulation goes in the walls and ceiling. These trades often overlap, with electricians working one day and HVAC technicians the next. This phase takes one to three weeks and ends with electrical and HVAC inspections to verify everything is installed correctly and safely before it gets covered up.
Interior and exterior finishing wraps everything up. Drywall or other wall finishes get installed and finished. Flooring goes in—tile, hardwood, luxury vinyl, whatever you’ve chosen. Trim work around windows, doors, and where the new room meets your existing house. Exterior siding or finishes that match your home so the addition looks like it was always there. Paint or stain. Light fixtures and outlet covers. This finishing work takes one to three weeks depending on the level of detail and how much customization you’ve chosen.
Final inspection happens when everything is complete. The building inspector does a walkthrough to verify that the finished room matches the approved plans and meets all code requirements. They check that electrical outlets work, HVAC functions properly, windows operate correctly, and the overall construction quality meets standards. Once you pass final inspection, you get your certificate of occupancy and the room is officially ready to use.
Weather can extend timelines, particularly for foundation work and exterior finishing. You can’t pour concrete in freezing temperatures. Heavy rain delays site work. Material delays occasionally happen, especially for custom windows or specialty finishes that aren’t kept in stock. Inspection scheduling depends on how busy your local building department is—some townships schedule inspections within a day or two, others take a week. We build some buffer into our timelines to account for these variables, but you should expect the process to take at least six to eight weeks from permit approval to completion for a straightforward project. Larger or more complex rooms take longer.
Is Adding a 4-Season Room the Right Investment for Your Nassau County Home?
Adding a 4-season room costs more than a three-season sunroom or screened porch. There’s no getting around that. But you get a room you can actually use year-round—not just when the weather cooperates. You get livable square footage that adds real value to your home, typically returning 49% to 72% of the project cost when you sell. And you get space designed specifically for how you want to live, whether that’s morning coffee with a view of your yard, family gatherings that don’t feel cramped, or a home office with natural light that doesn’t require overhead fixtures at noon.
The process involves more steps than most Nassau County homeowners expect when they start researching. Permits and inspections at multiple stages. Foundation work that’s engineered for conditioned living space, not just a deck. HVAC decisions that affect both the new room and your existing home’s comfort. Insulation and glass specifications that determine whether the room actually works in Long Island’s climate or becomes an expensive space you rarely use. But each of these steps exists for a reason. Skipping them or cutting corners creates problems that cost more to fix later than doing it right the first time.
If you’re considering adding a 4-season room to your Nassau County home, working with experienced professionals who understand Long Island’s building codes, climate requirements, and permit processes makes the difference between a successful project and an expensive headache. We’ve been handling these projects for nearly 50 years, managing everything from permits and town hearings through HVAC integration and final inspections so homeowners can focus on enjoying their new space instead of managing construction details.